Diagnostic Tool User's Guide
This document provides an overview of the Kawasaki Diagnostic Tool PC application.
For the mobile app user's guide, click here.
Prerequisites
The Kawasaki Diagnostic Tool runs on Windows Vista or newer. A dual core or greater PC is required.
If Microsoft .NET 4.5 is not installed, it will be installed automatically.
Viewing service documents requires the Adobe Acrobat Reader. It can be downloaded from Adobe here.
Installation
Download the Kawasaki Diagnostic Tool PC application installer executable from here.
Once downloaded, run the installer executable and click through the wizard.
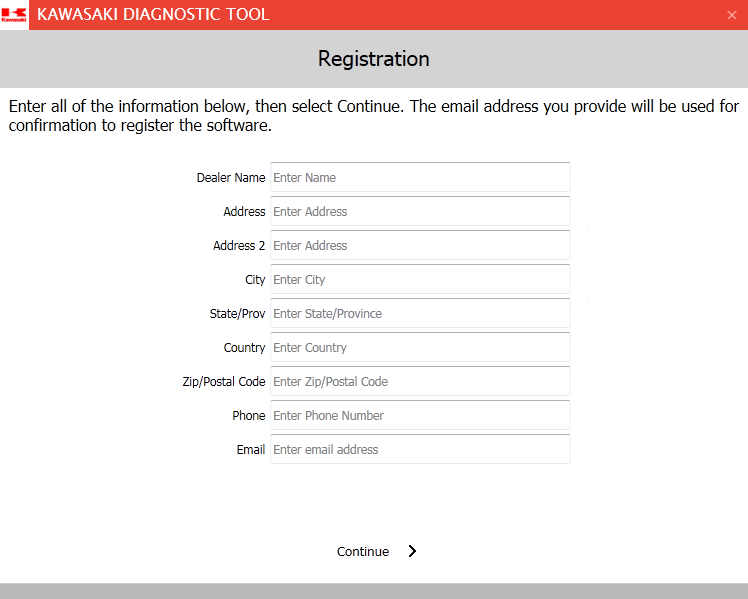
When installation is finished, the application will automatically launch for the first time. Click OK in the “What’s New” dialog, and the registration dialog will be shown. Enter your dealer contact information here and select Continue.
Registration will require an internet connection. Be sure to provide an email address that’s readily accessible to you.
The provided email address should then receive a confirmation email. Click the link in the email to register and activate the software. You should be directed to a web page that says "Your Kawasaki Diagnostic Tool is now registered
and can be used.”
The software can be run no more than 10 times without registration.
Connection
Connect the Kawasaki Electronic Interface (KEI) module to a USB port on the PC. Connect the adapter cable to the KEI and to an engine. Switch the engine ignition to the On position.
Engine Selection
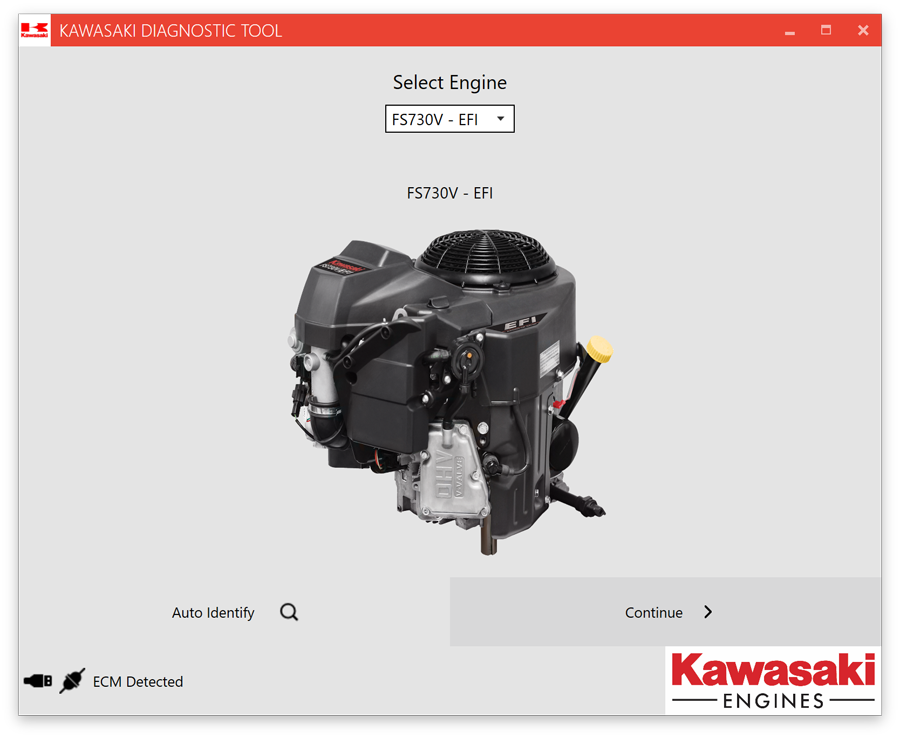
The Engine Selection screen is shown initially when the application is launched.
To automatically select the engine,
To manually select the engine,
Main Menu
The Main Menu screen is shown after the engine is selected. All available functions can be accessed from this screen by clicking on the icons.
The left arrow button at the upper left acts as a “Back” button for a given screen. On the Main Menu, it will back out to the Engine Selection screen. The currently selected engine is show next to it.
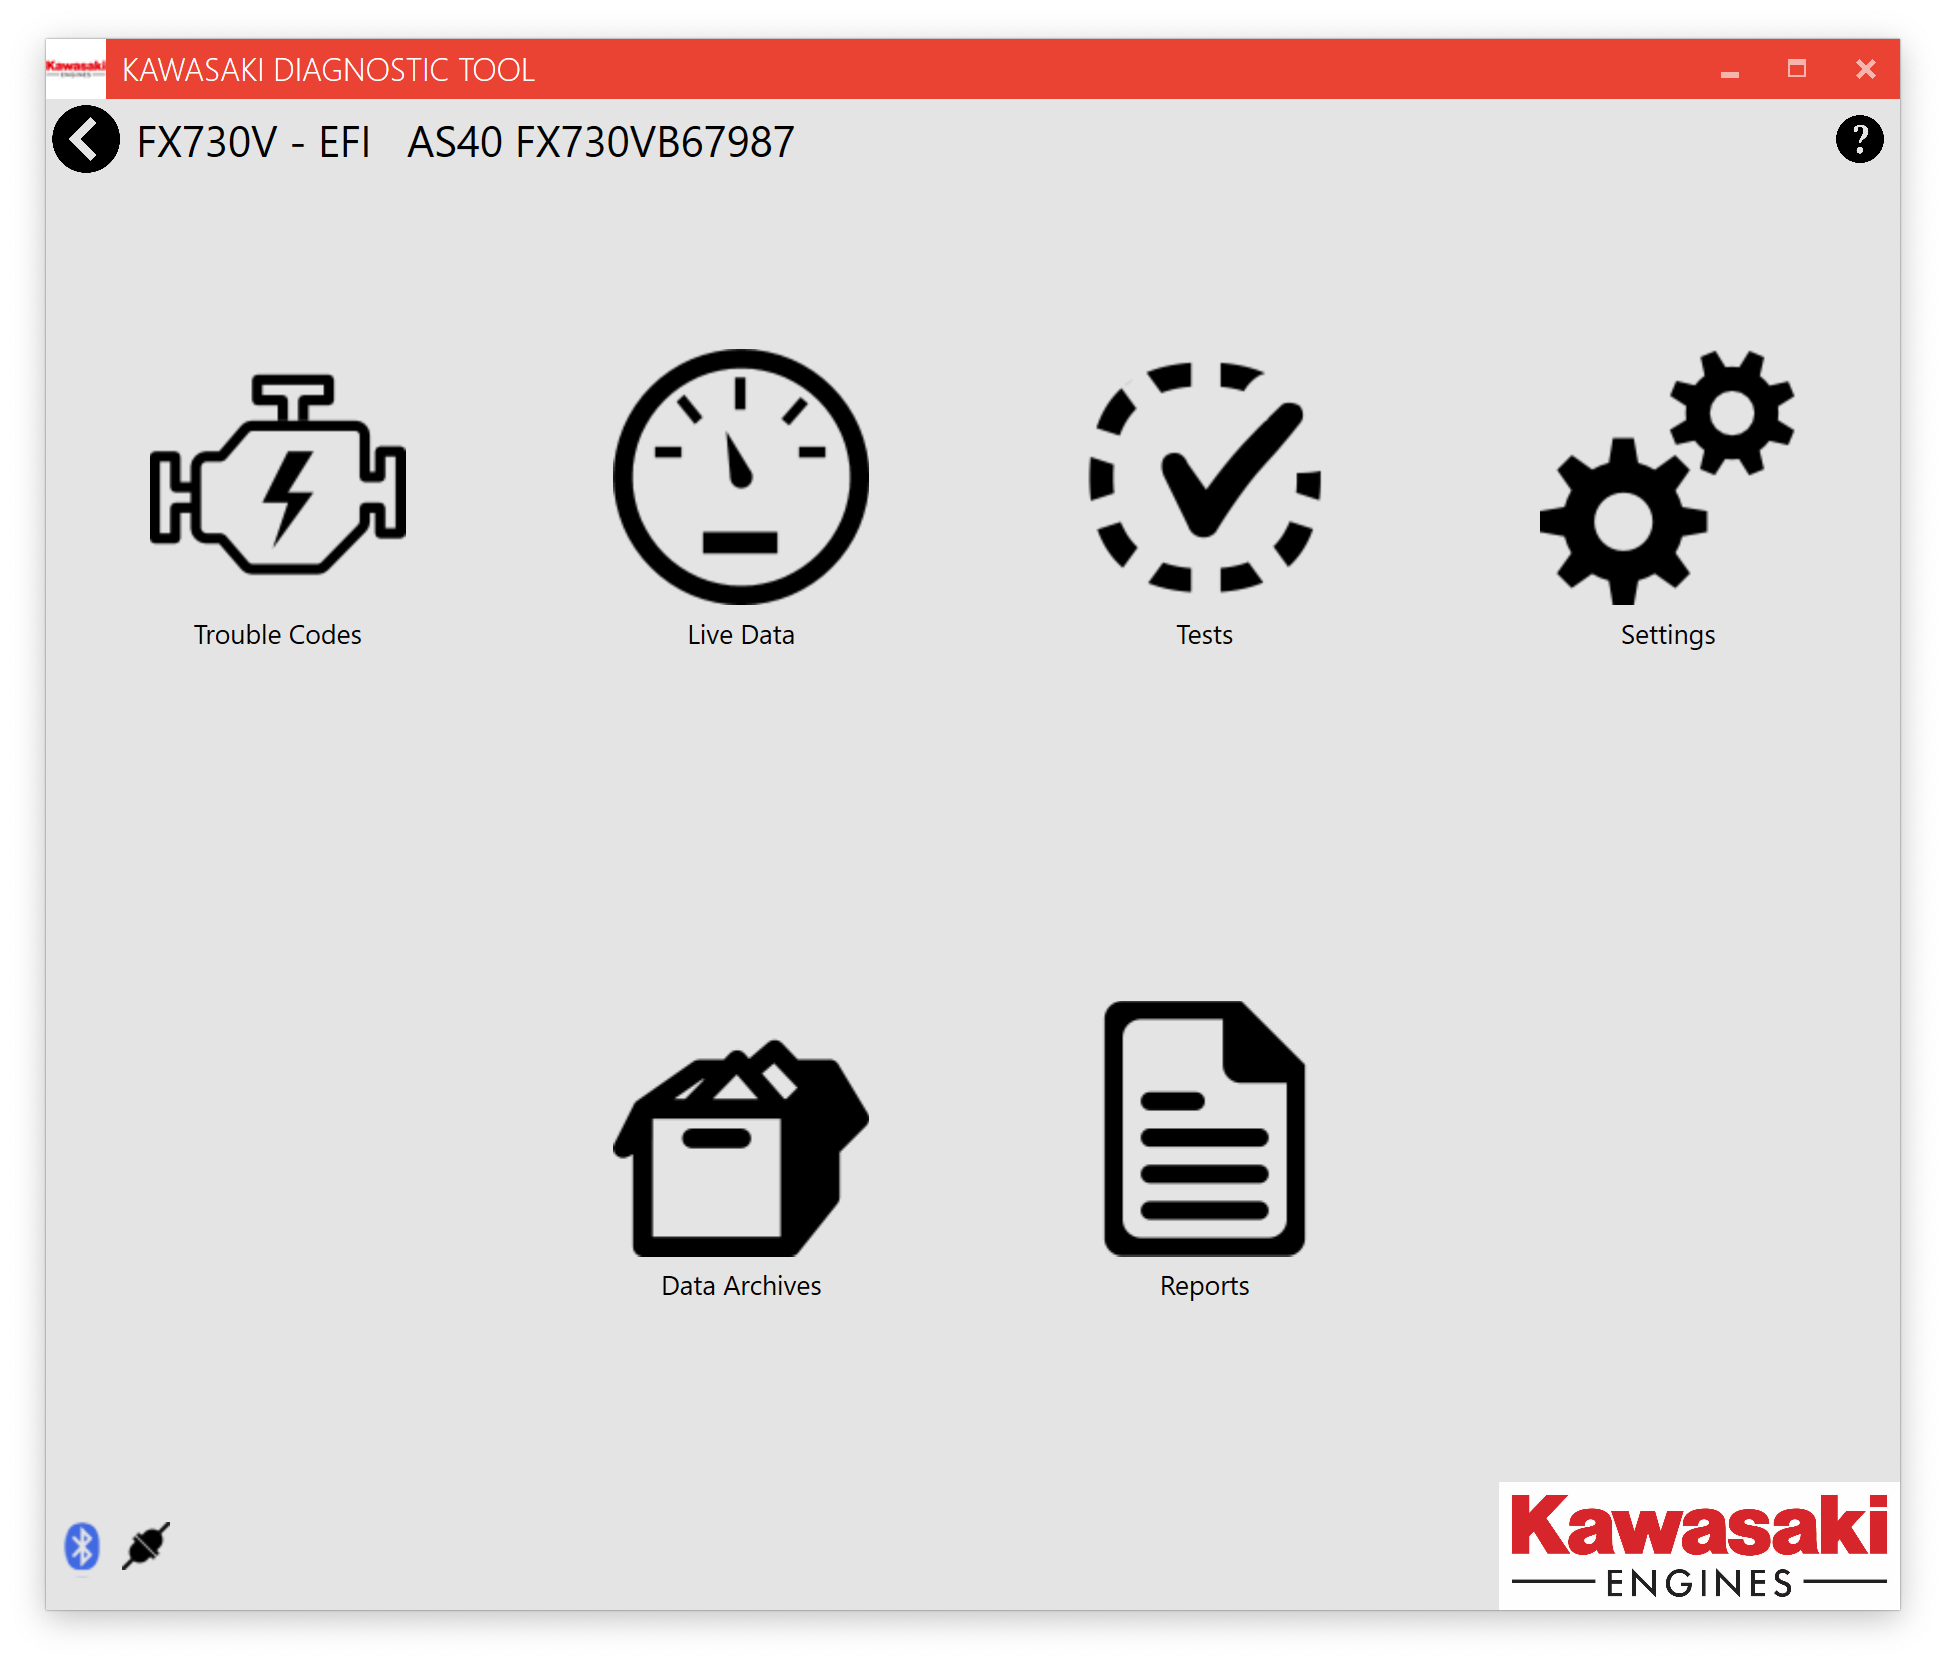
The icons in the lower left corner indicate whether the Kawasaki Electronic Interface (KEI) module is connected via USB or Bluetooth, and whether an engine is connected to the KEI and the ECU is communicating properly. Here's how it should look when everthing is connected via USB and the ECU is on and functioning:

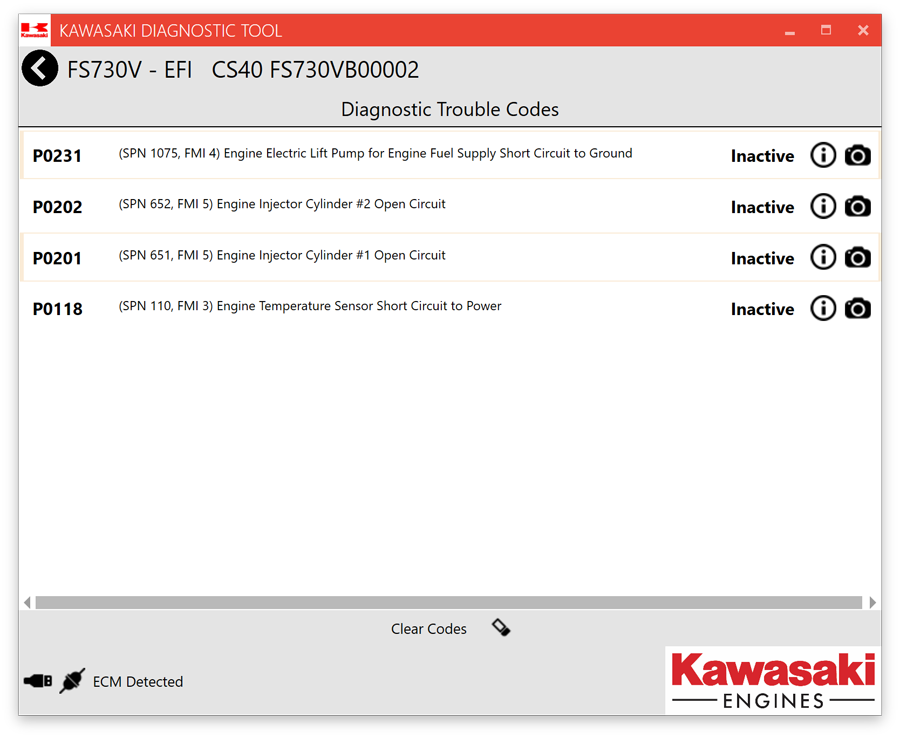
Trouble Codes
Active and Inactive trouble codes are listed on the Trouble Codes screen. The Clear Codes button at the bottom center will clear codes.

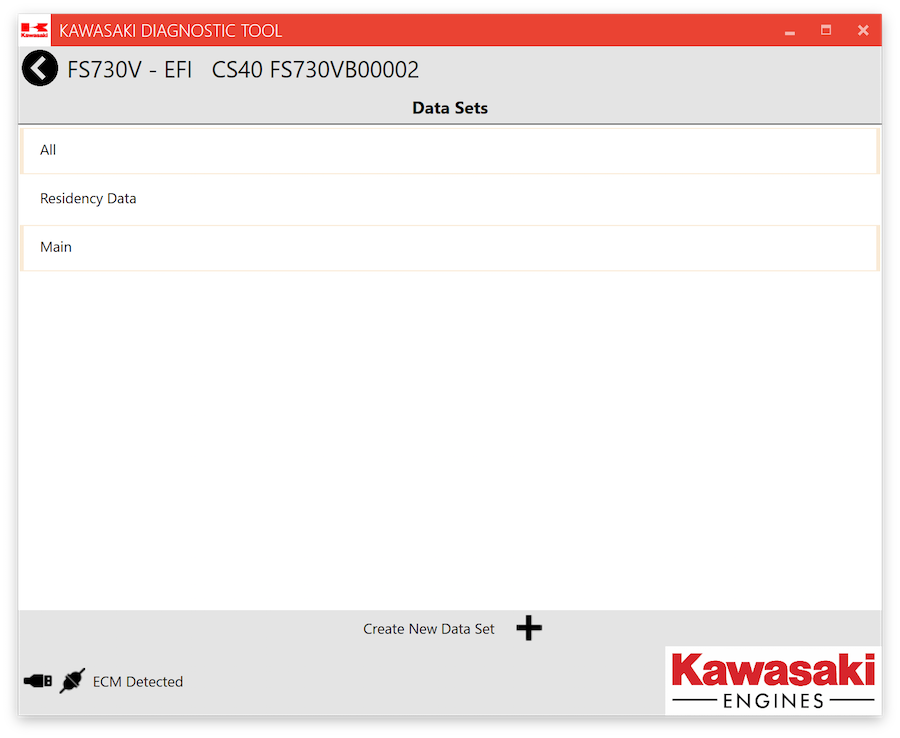
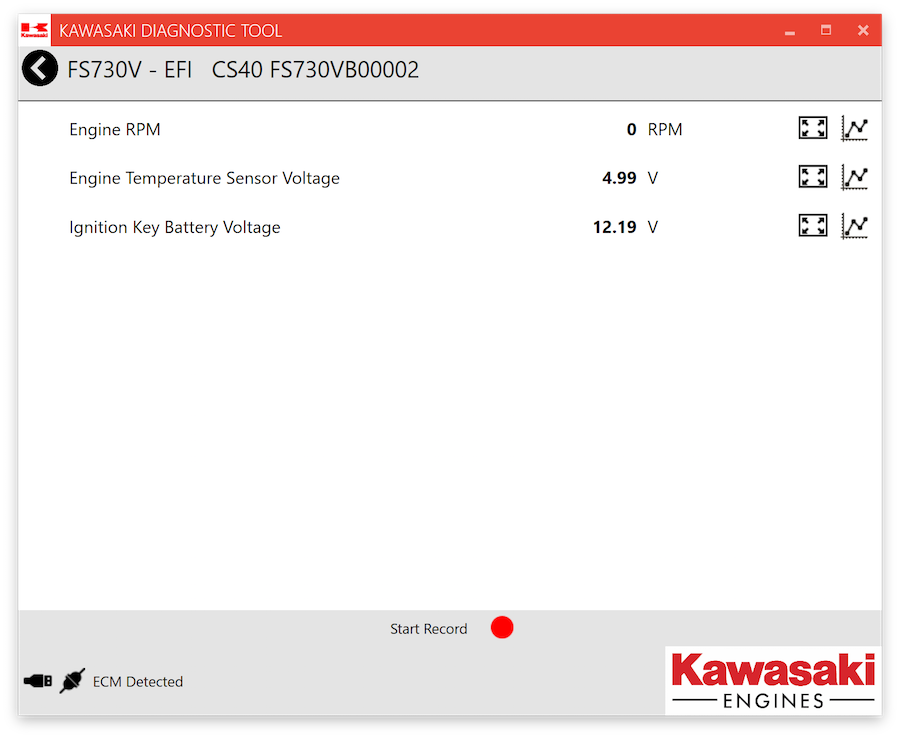
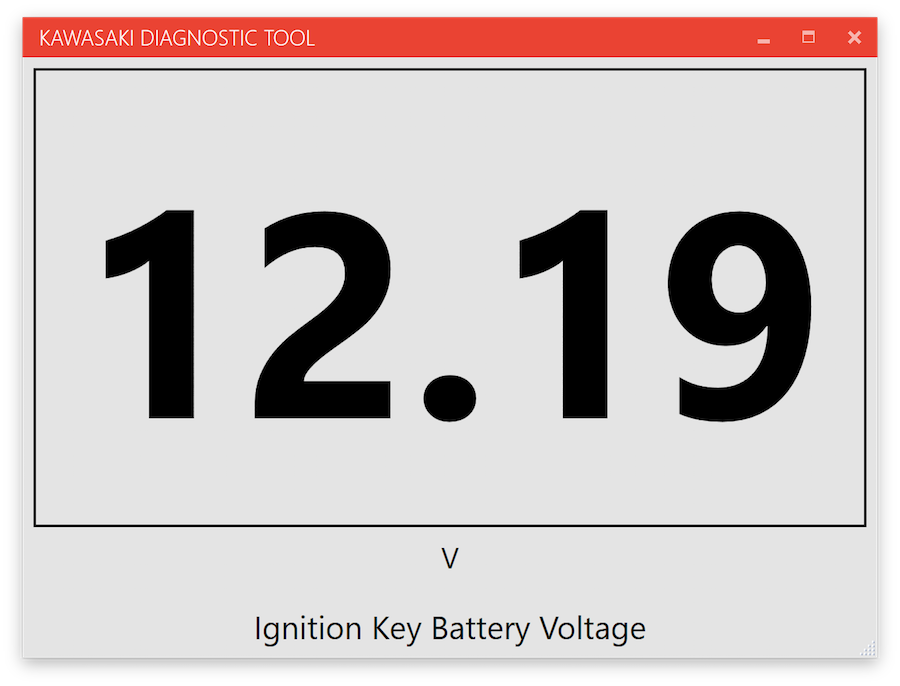
Live Data
The Live Data button the Main Menu will show available Data Sets. There are three built-in data sets available – All, Residency and Main.
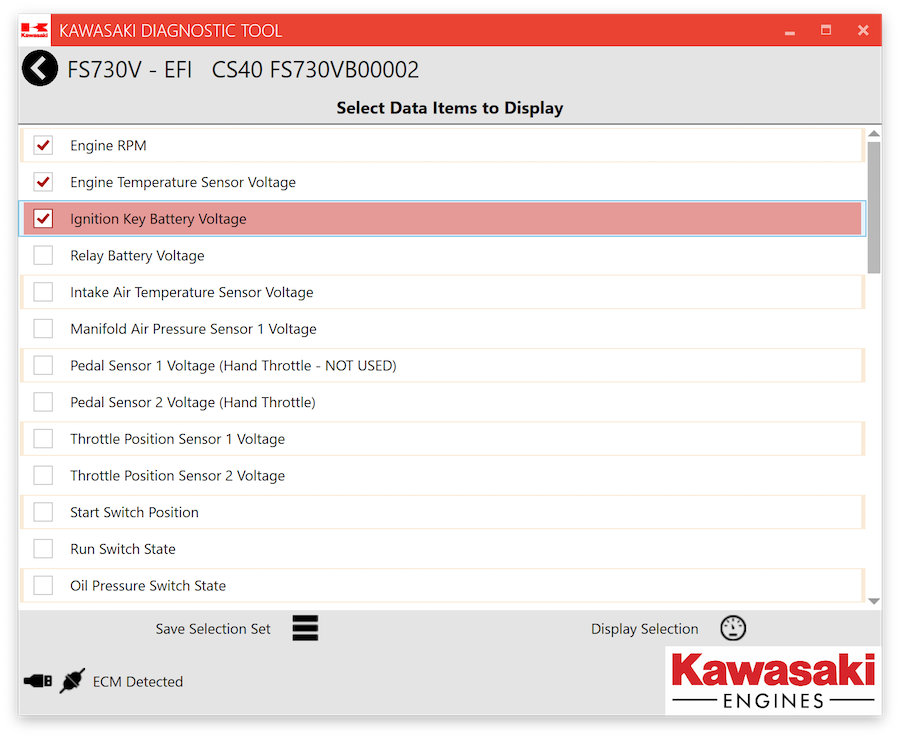
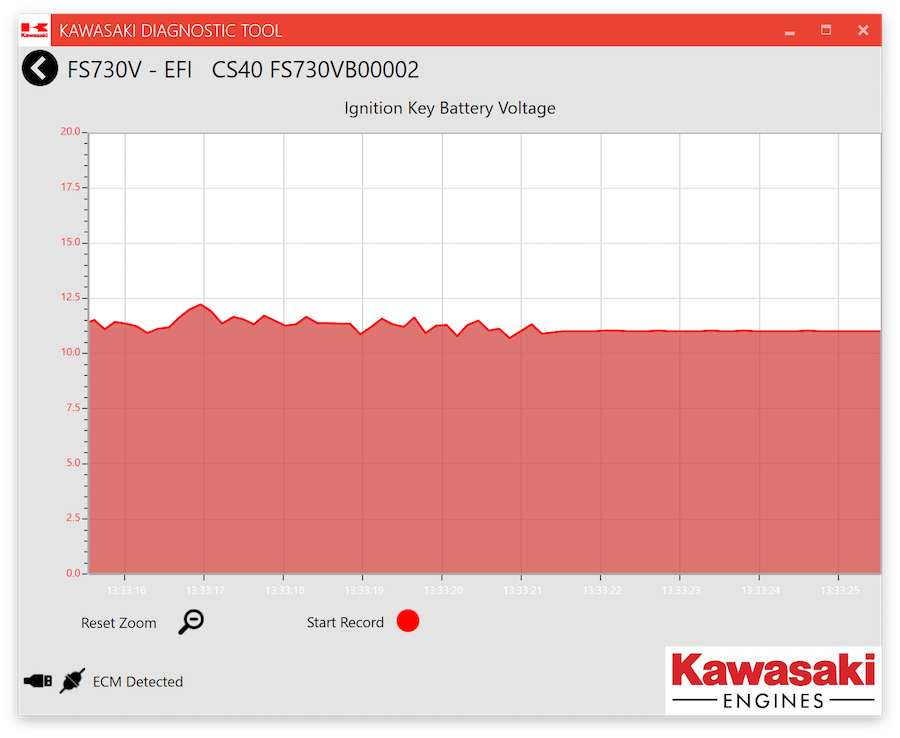
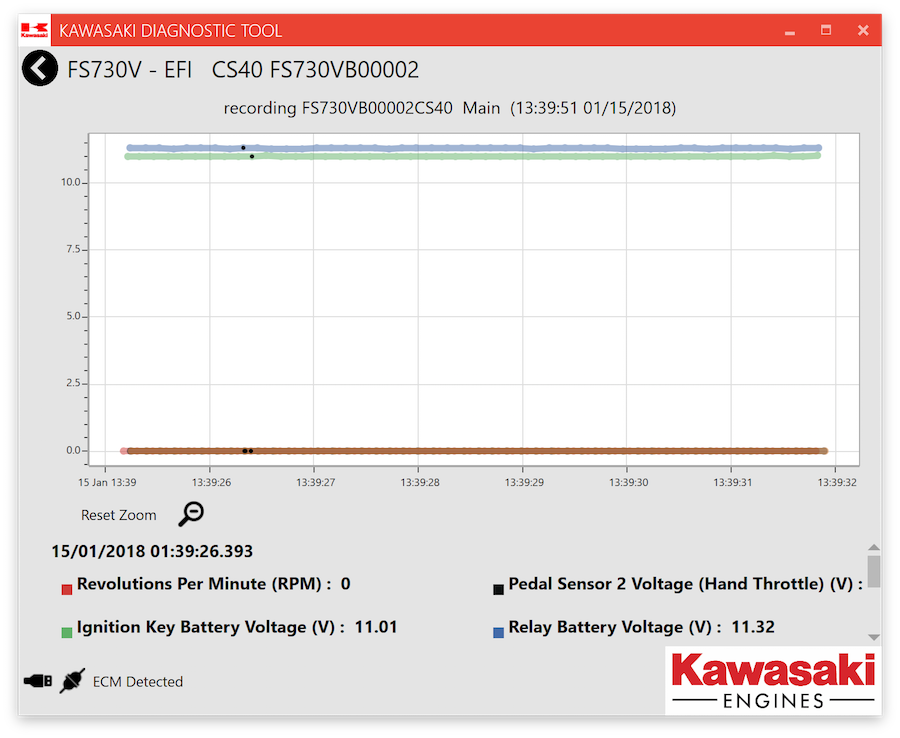
Data Recording
If a custom data set has ten or fewer items, the data set can be recorded.
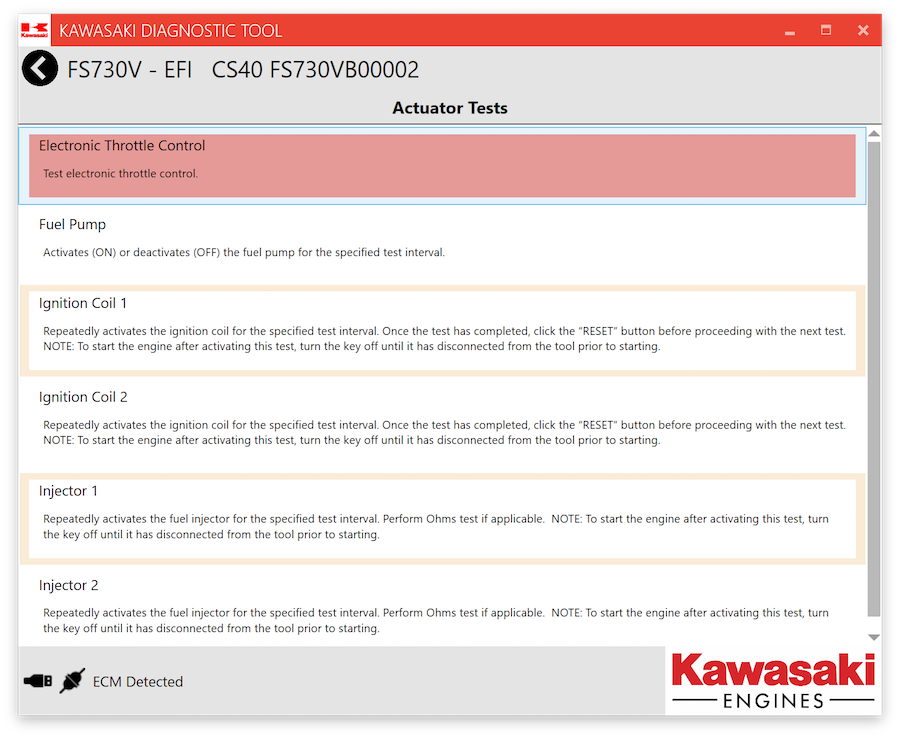
Tests
The Tests screen shows a list of all available actuator tests.
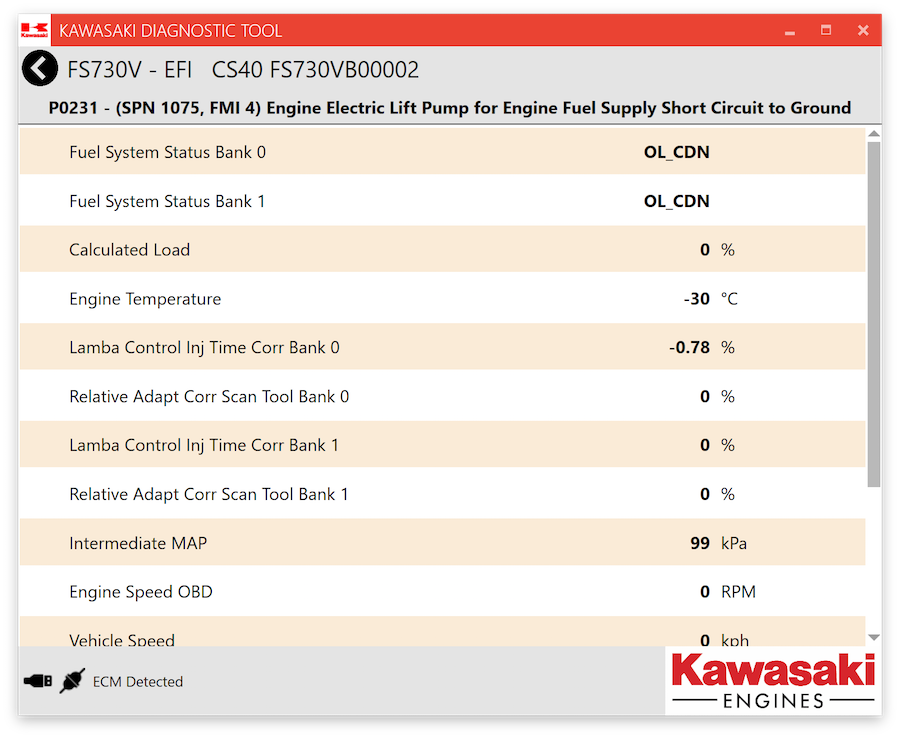
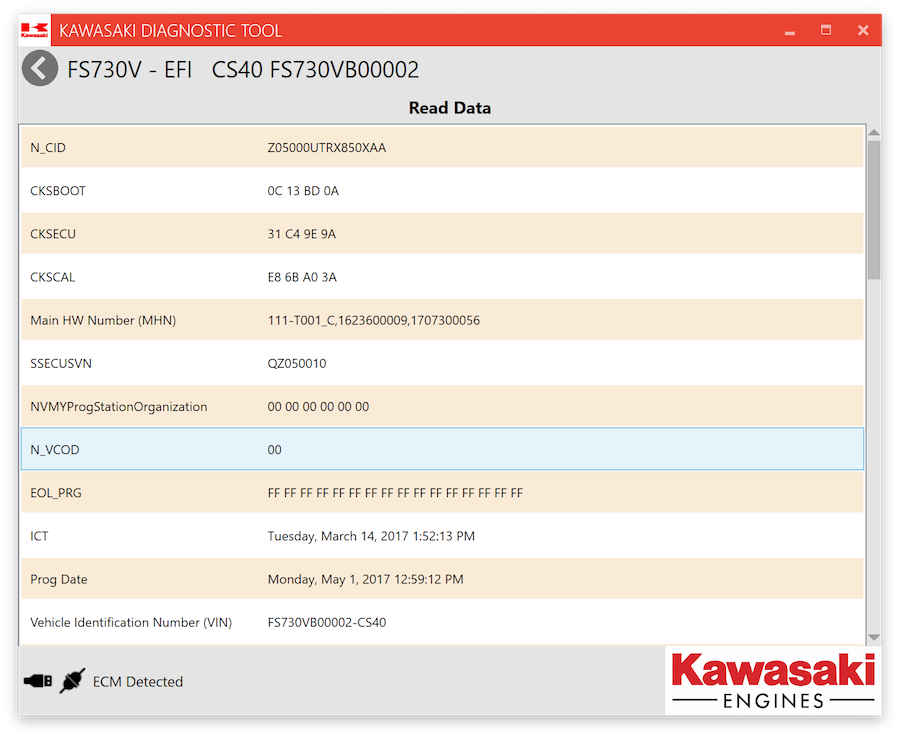
Read Data
The Read Data screen reads and displays all available ECU information.
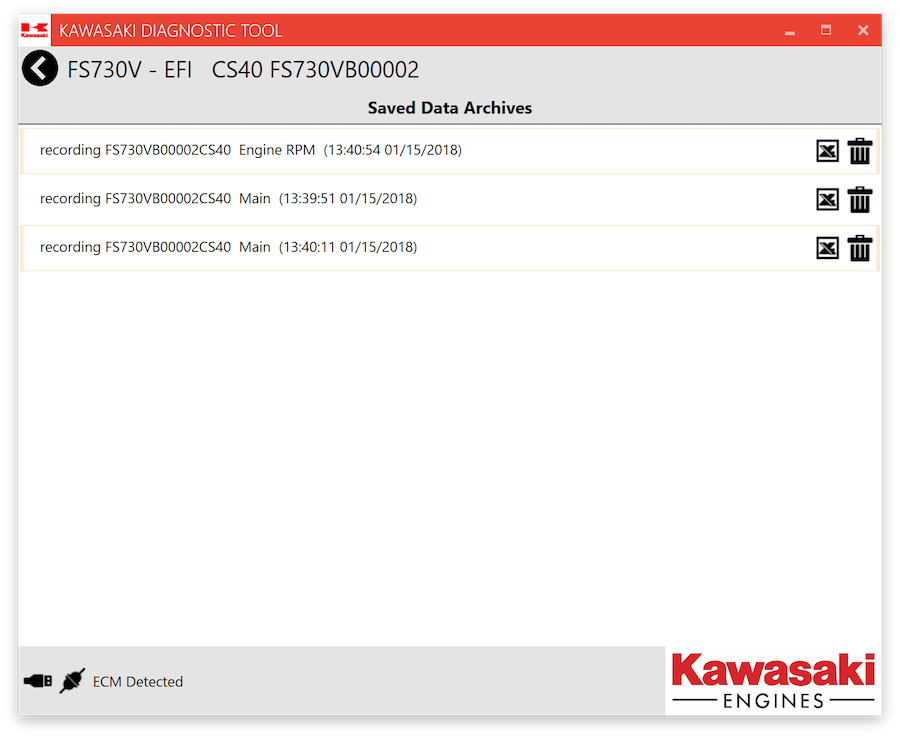
Data Archives
Saved recordings can be viewed on the Data Archives screen.
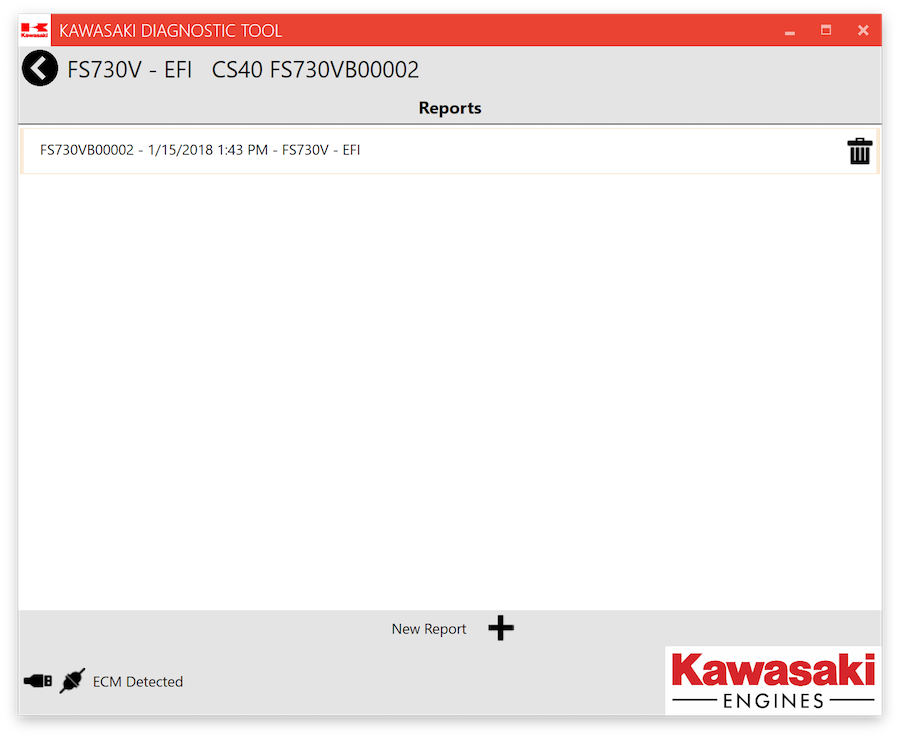
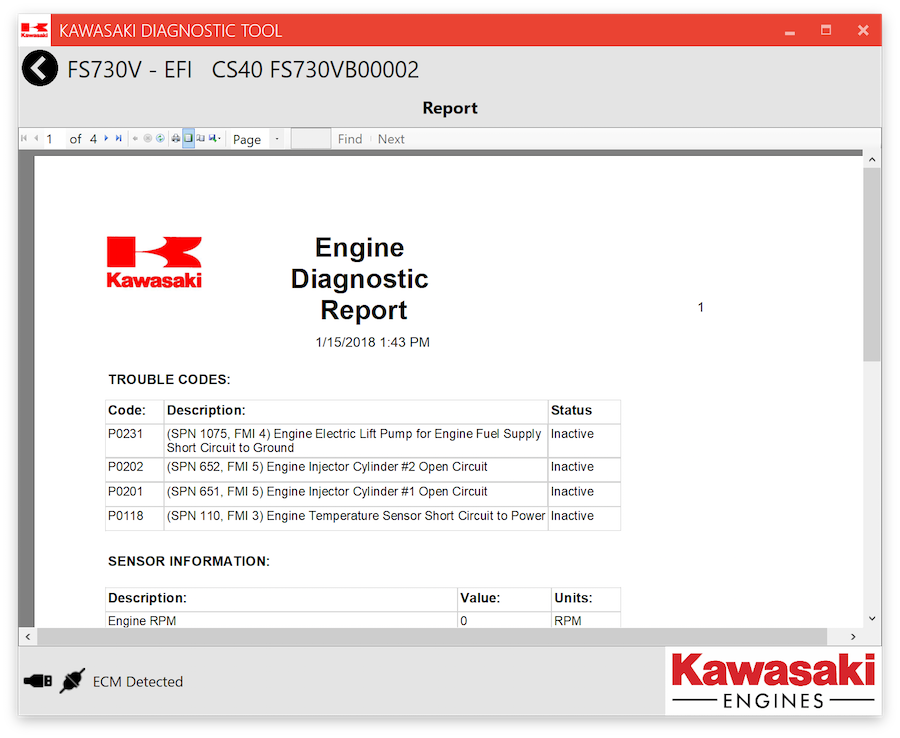
Reports
A printable service report can be generated and viewed on the Reports screen.
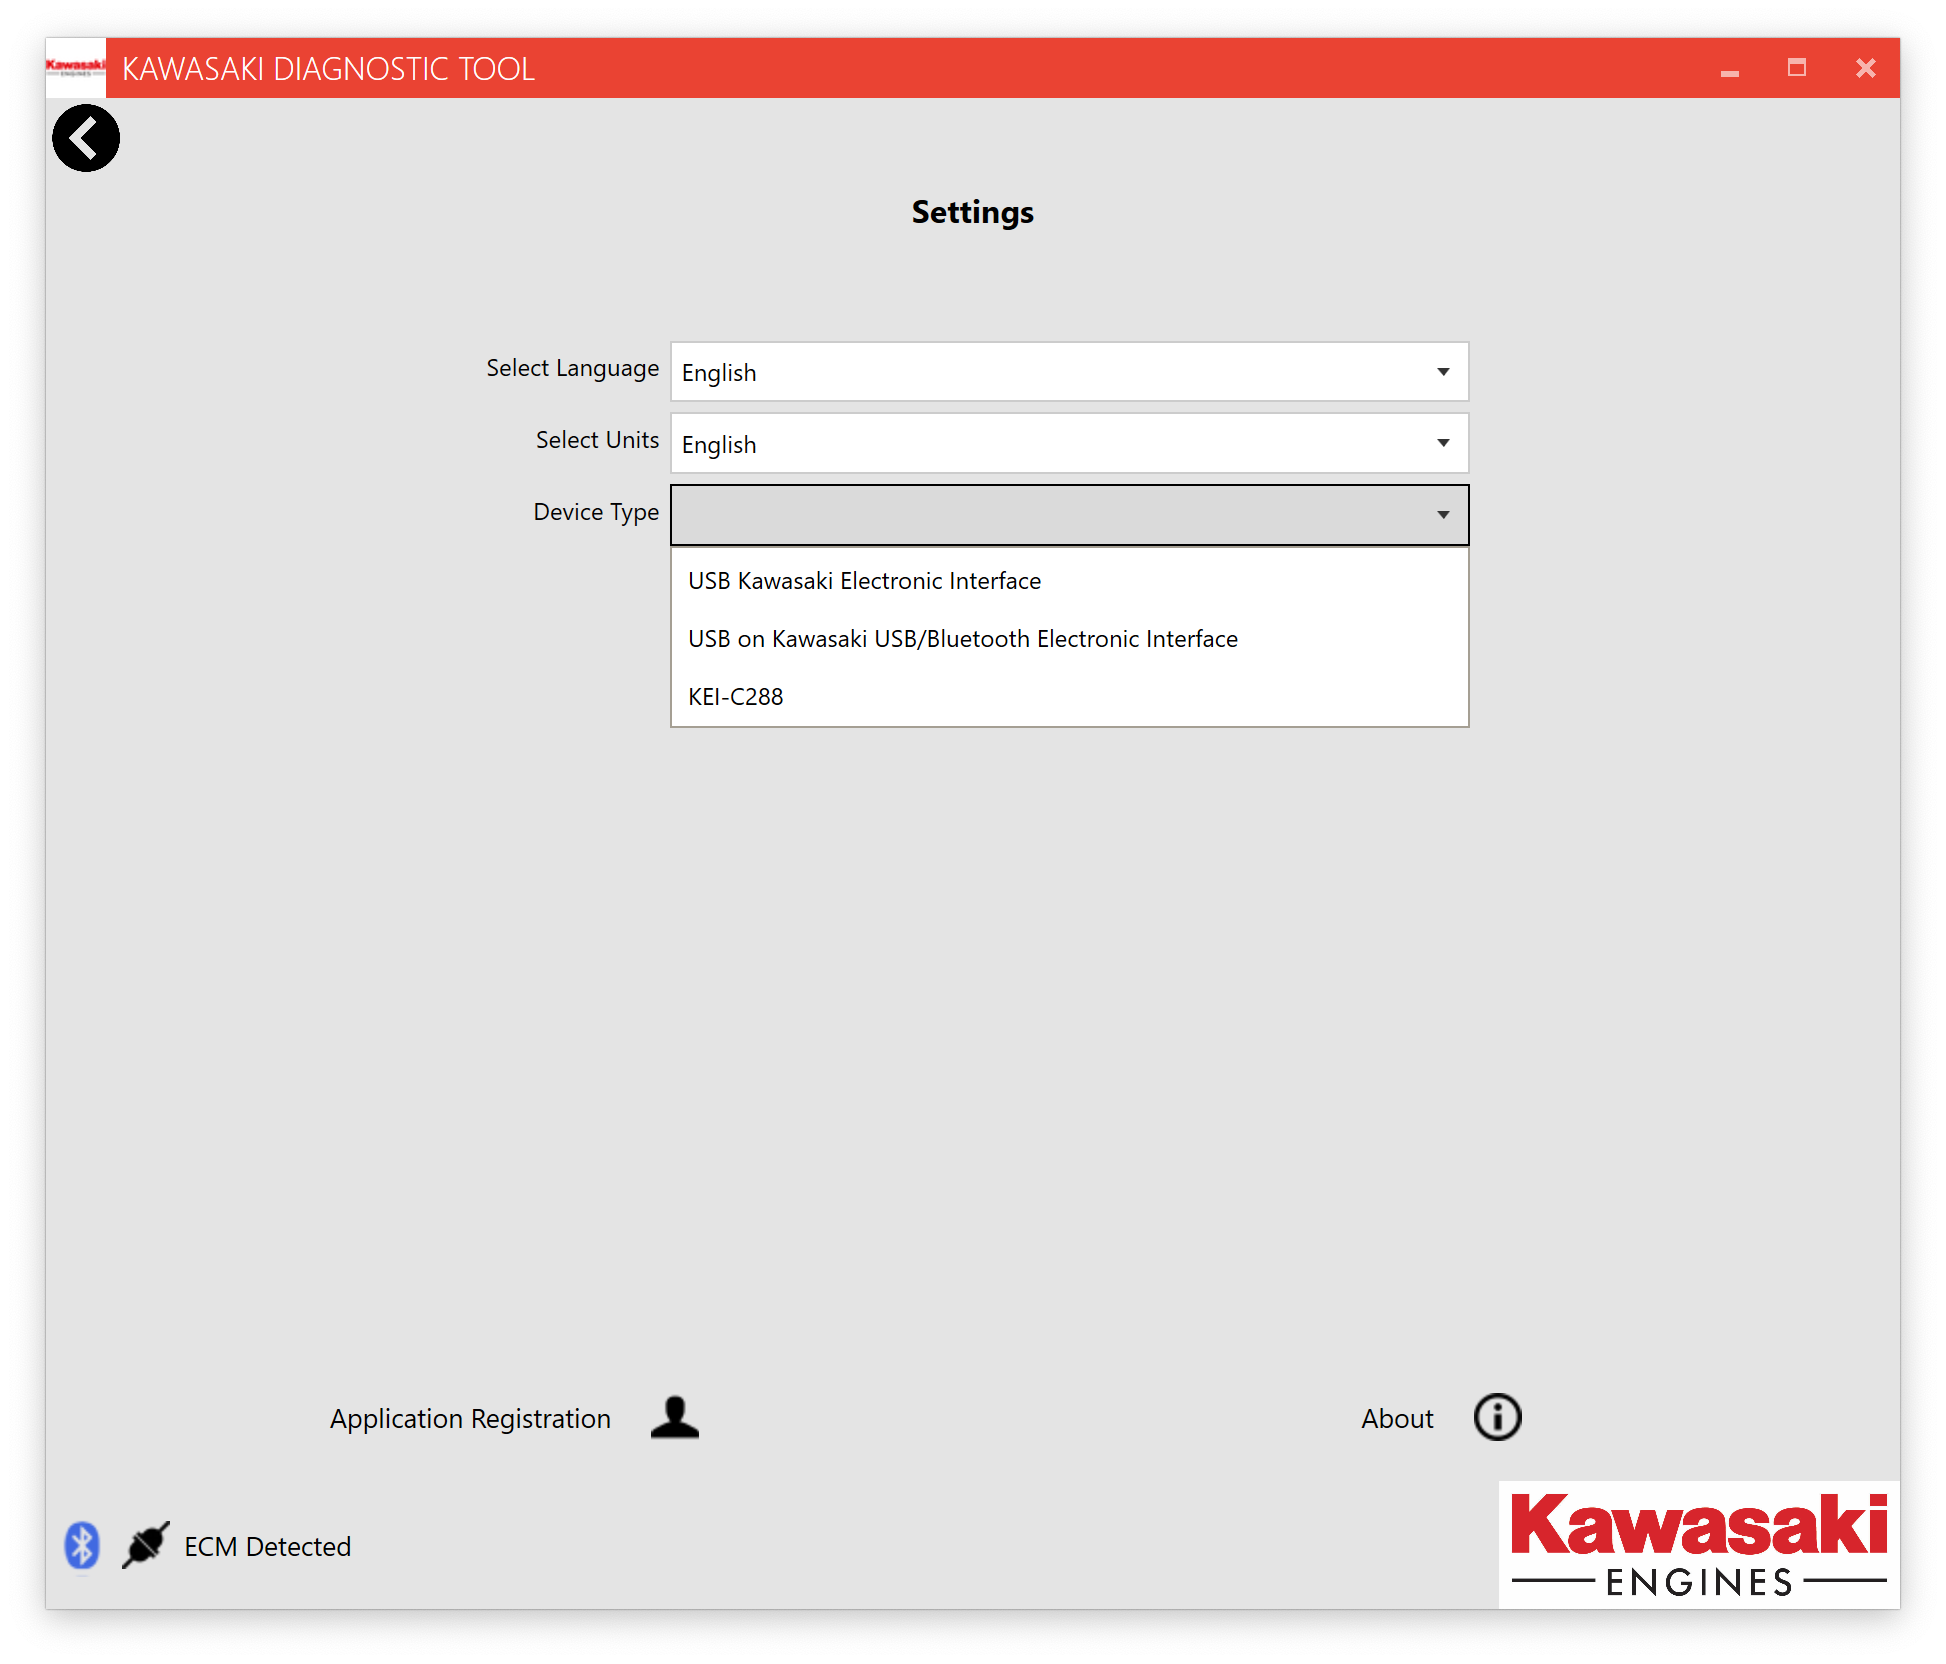
Settings
On the Settings screen, select the desired language and units for data items.
If using Bluetooth, select the paired Bluetooth device under Device Type. The device name starts with KEI-XXXX.
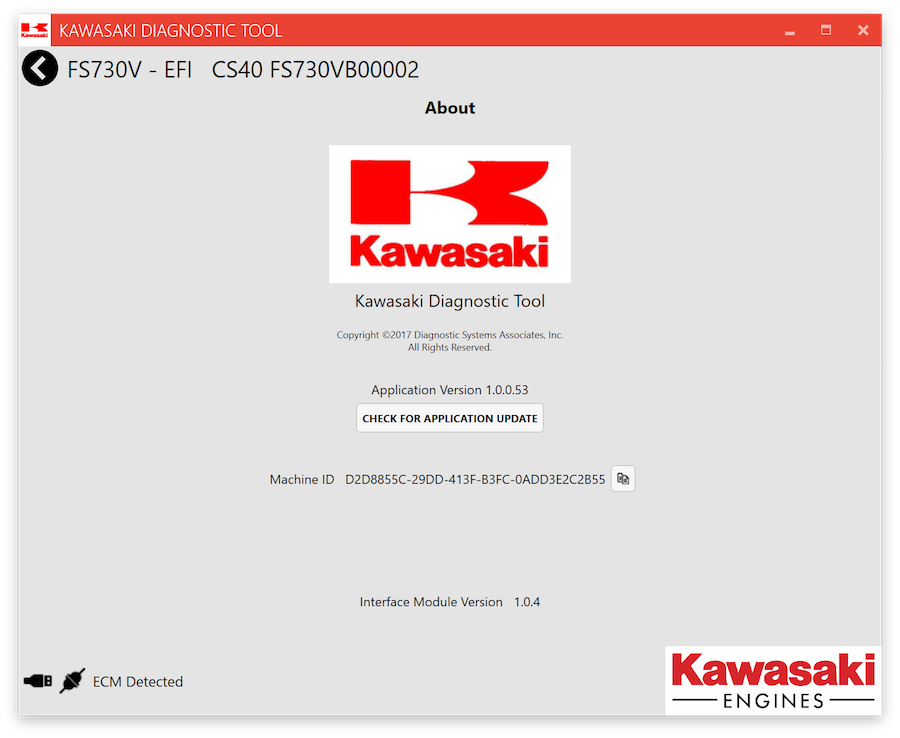
About
On the About screen, click Check for Application Update to check the current version (internet required).